Wondering how to add a contact form to your WordPress site with Ninja Forms? You’re at the right place.
A contact form is a great way to offer your readers the ability to get in touch with your visitors and build a connection. But the default WordPress contact form is plain boring. It doesn’t prompt people to contact you or simply drop you a message. In other words, it lacks a personal touch.
In this article, you’ll learn how to create an engaging contact form for WordPress with Ninja Forms.
What Is Ninja Forms?
Ninja Forms is a free drag-and-drop form builder for WordPress — probably one of the best form builder plugins. It makes it easy for you to create any type of forms for your website with no coding — no headache.
While the plugin is free, it has tons of premium add-ons you could purchase to build a more complex form. A file upload form. A multi-step form. Or complex layout form.
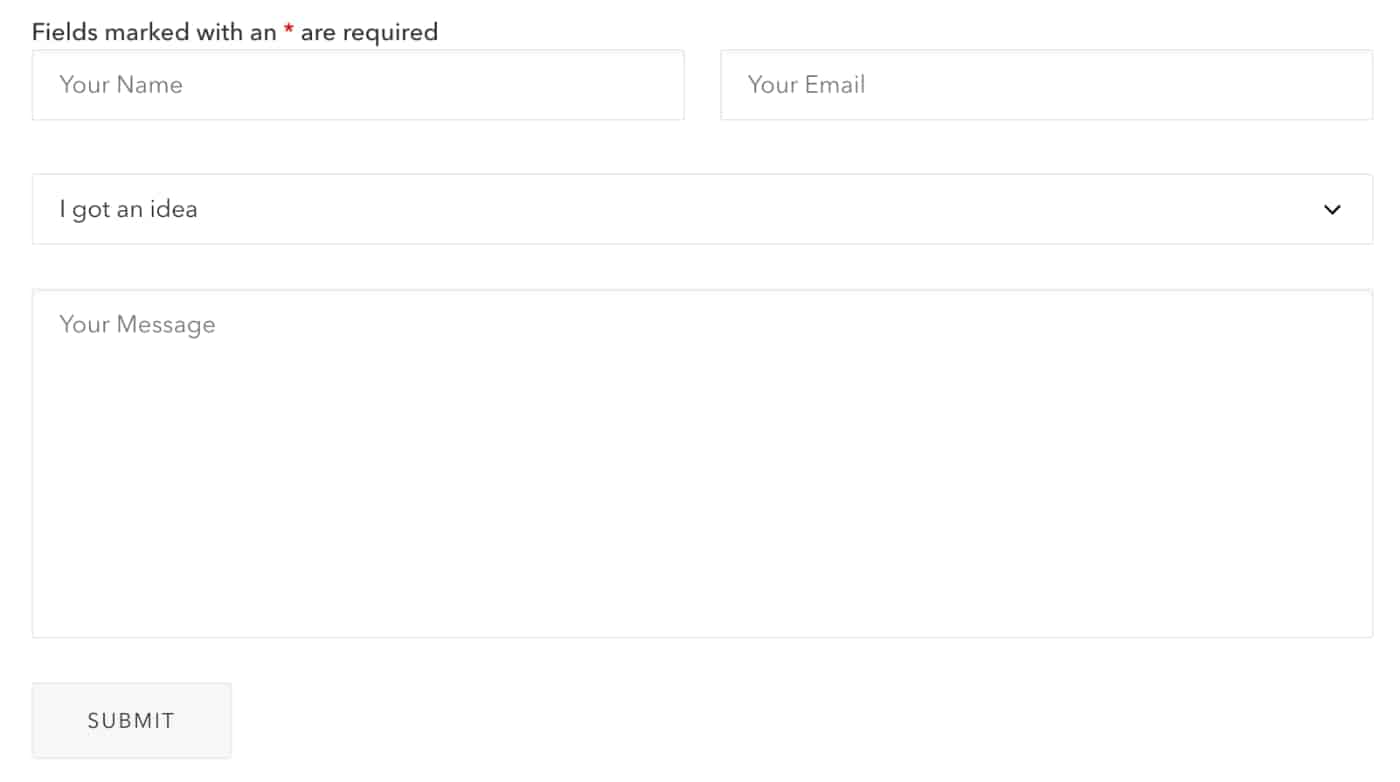
For our contact form, we’ll add a dropdown field to make the contact form looks more professional and engaging to your visitors. The dropdown field will give ideas to your visitors why they should get in touch with you.
Like this.
You might notice, I don’t include Captcha here. Captcha is good to prevent spam and bot. But, let’s face it. Nobody likes them.
Adding Captcha might have a negative impact on your conversion rates. A study shows that you could lose up to 3 percent of total conversions — just by adding Captcha.
Let’s get started.
[click_to_tweet tweet=”Create Engaging WordPress Contact Form Easily with Ninja Forms” quote=”Create Engaging WordPress Contact Form Easily with Ninja Forms”]
Creating a WordPress Contact Form
Step 1: Download and install Ninja Forms plugin
The first step is to install the plugin. You could download the plugin from the official website and upload it to your WordPress site or download the plugin through the admin dashboard. If you prefer the second method, go to Plugins > Add New and type “Ninja Forms”.
Download and activate the plugin.
Step 2: Create a new form
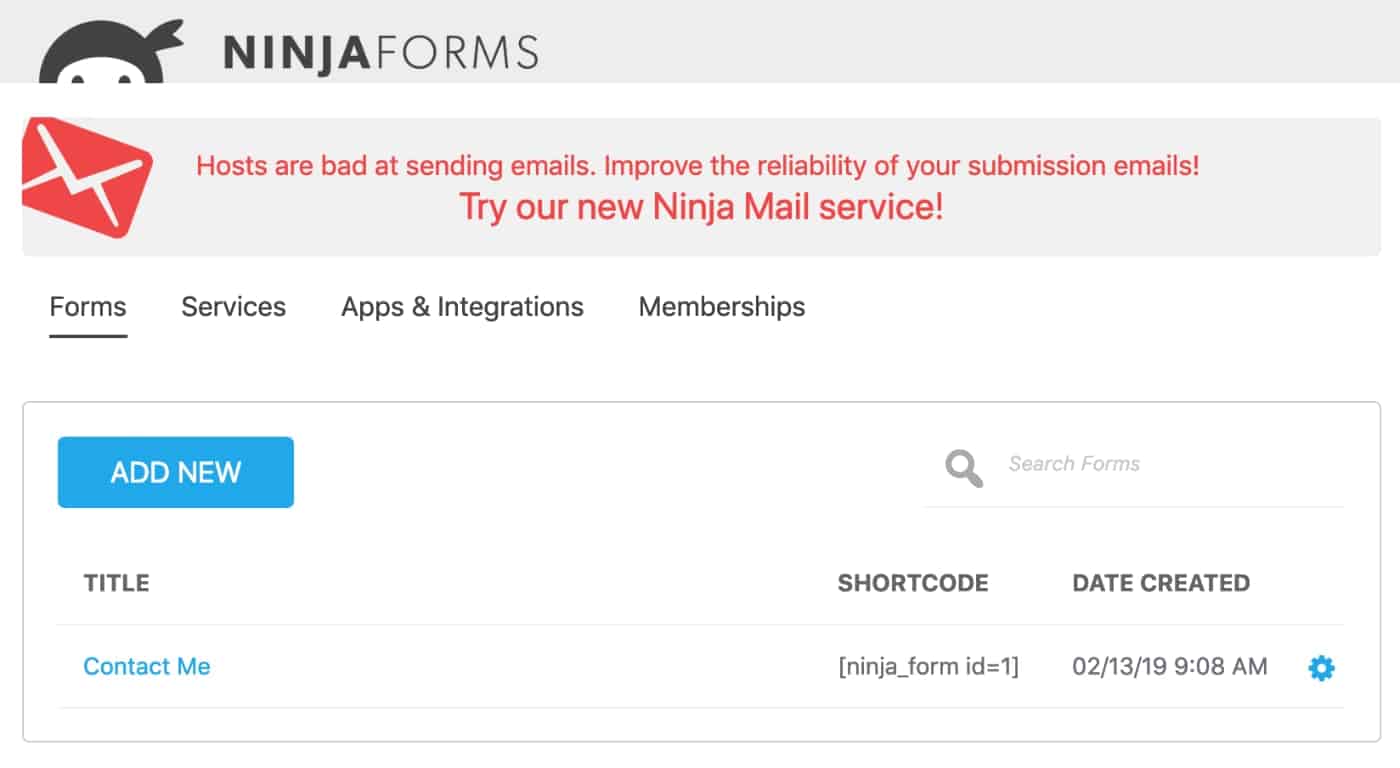
Once you activated Ninja Forms, you’ll find it on your Admin sidebar. Click on Ninja Forms and you’ll list of forms available on your form dashboard.
Click “Add New” button to create a new form. Either choose “Blank Form” — to start from scratch — or chose any pre-made template. For this tutorial, we’ll choose “Contact us” template.
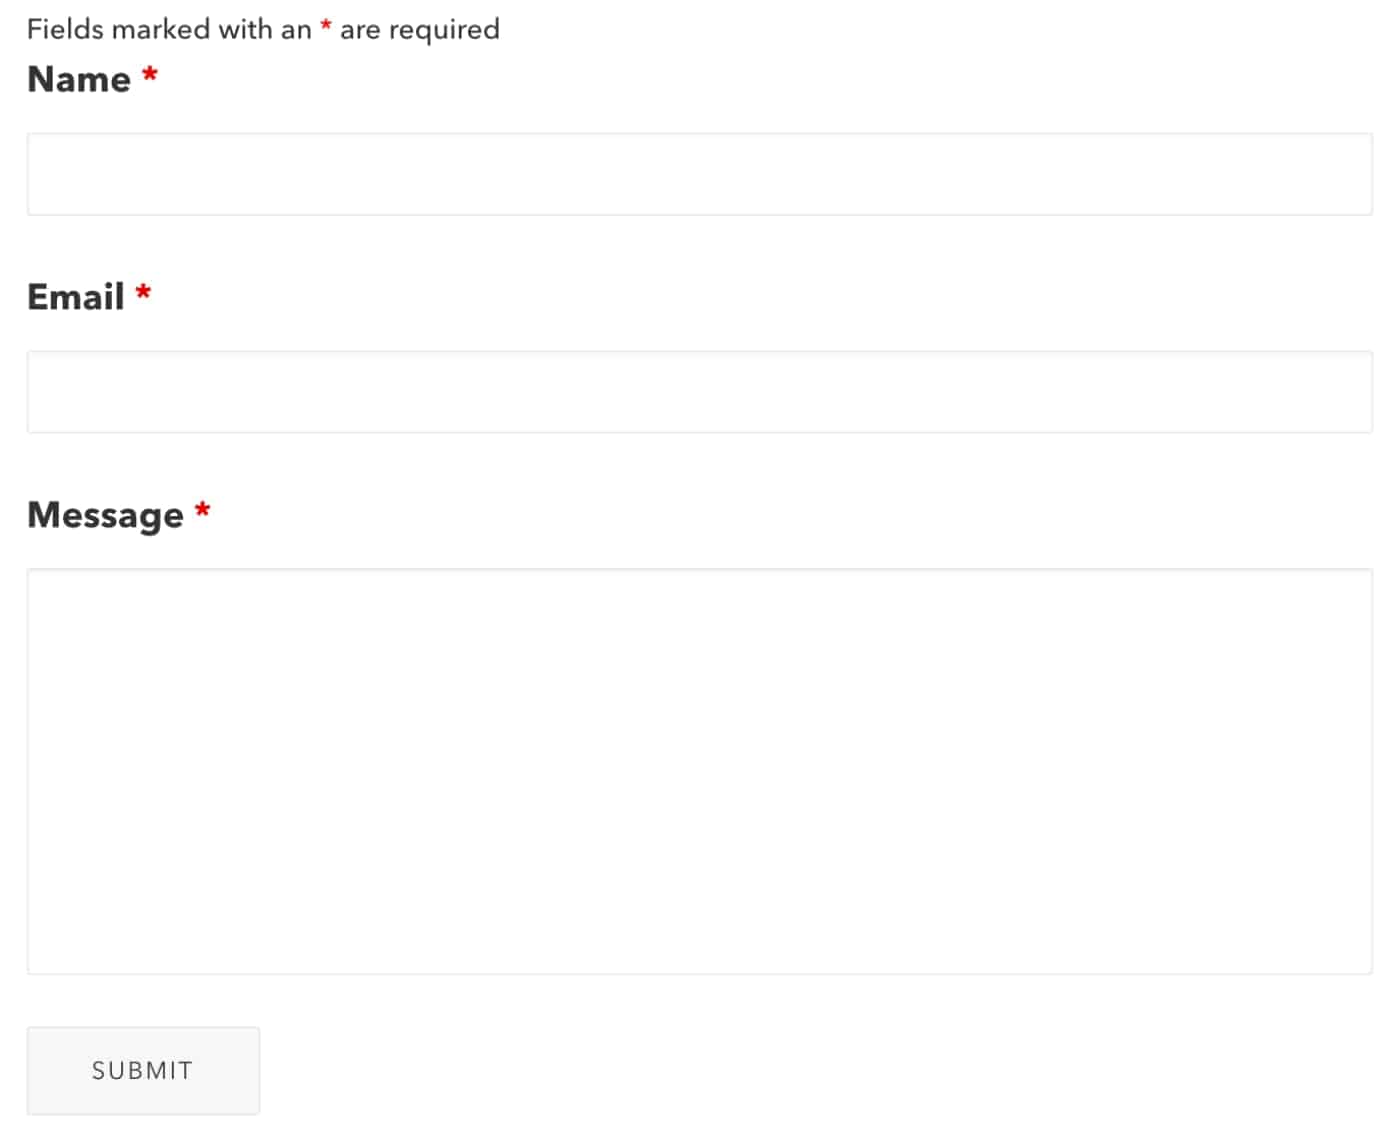
The premade “Contact Us” template comes with 3 default fields. A name field. An email field. And a message field.
And it has a pretty basic layout too. Like this.
Step 3: Modify existing form style
There are few things we’re gonna change here:
- Hide the field label
- Add a placeholder on each field — as a replacement for the label
- Apply a special class to name and email field so they appear on the same row
- Add a new dropdown field to the form that serves as the form’s purpose
Name Field
First, click on the name and you’ll a bunch of settings you could configure on the right of your screen. Set the label position to Hidden. This will prevent the label from getting displayed.

Next, scroll down to the Display section and add the following class to the container “one-half first” — without the parenthesis. This will tell Ninja Forms to display this field in half column and display it first.

Last, scroll down to the Advanced section and add a placeholder. Placeholder is a text user will see when the input is empty.
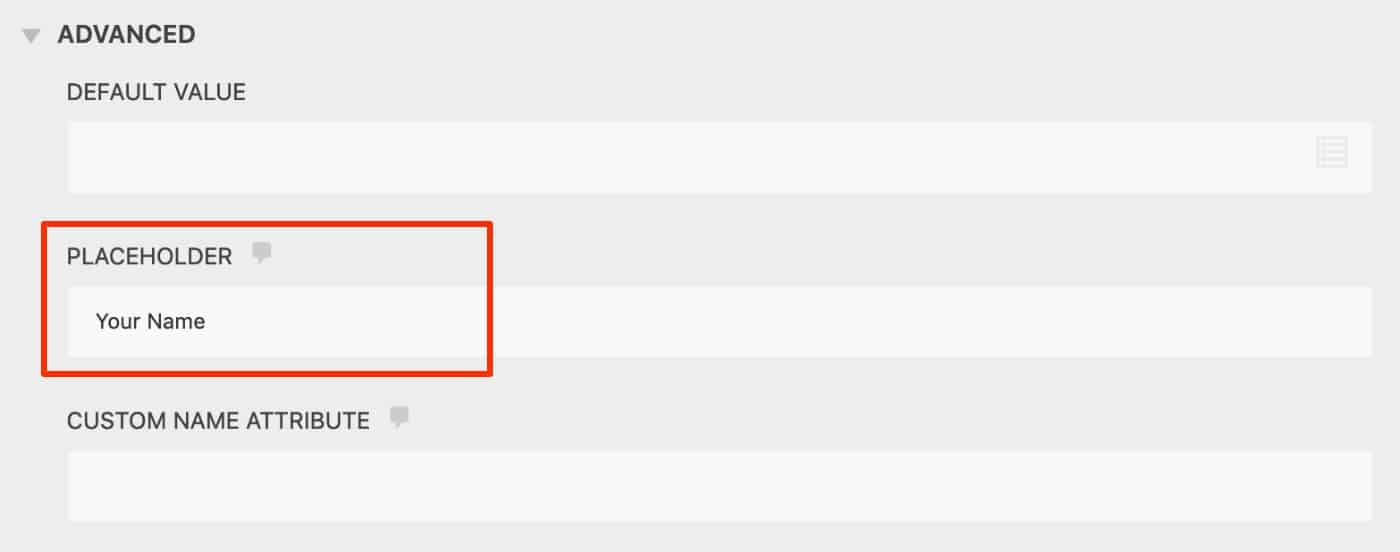
Email Field
Email field’s configuration is similar to the Name field above. Except we’re using a different class name for the container. Go ahead and set the label position to hidden and add a placeholder as seen below.

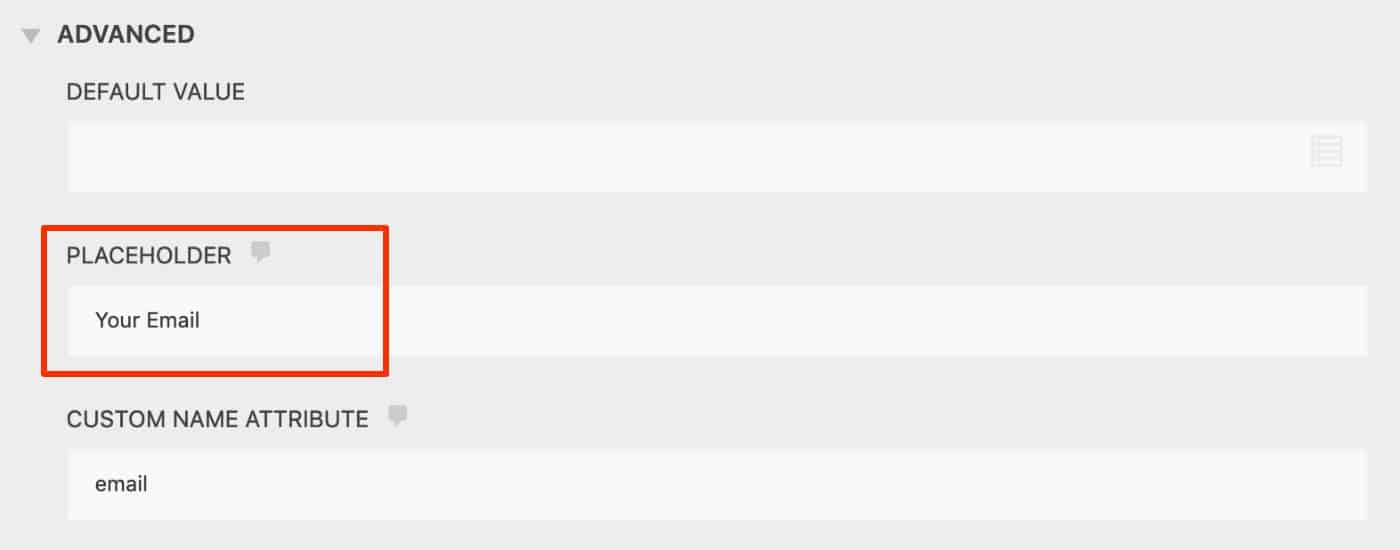
For the container class, we’re going to use “one-half last”. Notice the “last” class here. This class tells Ninja Forms to display the email field after the name field.

Purpose Field
Click on the “+” icon to add a new field to the form. Choose the “Select” field and drag it to the form — right after Email.

Set the label position to Hidden and add in the options as seen below.
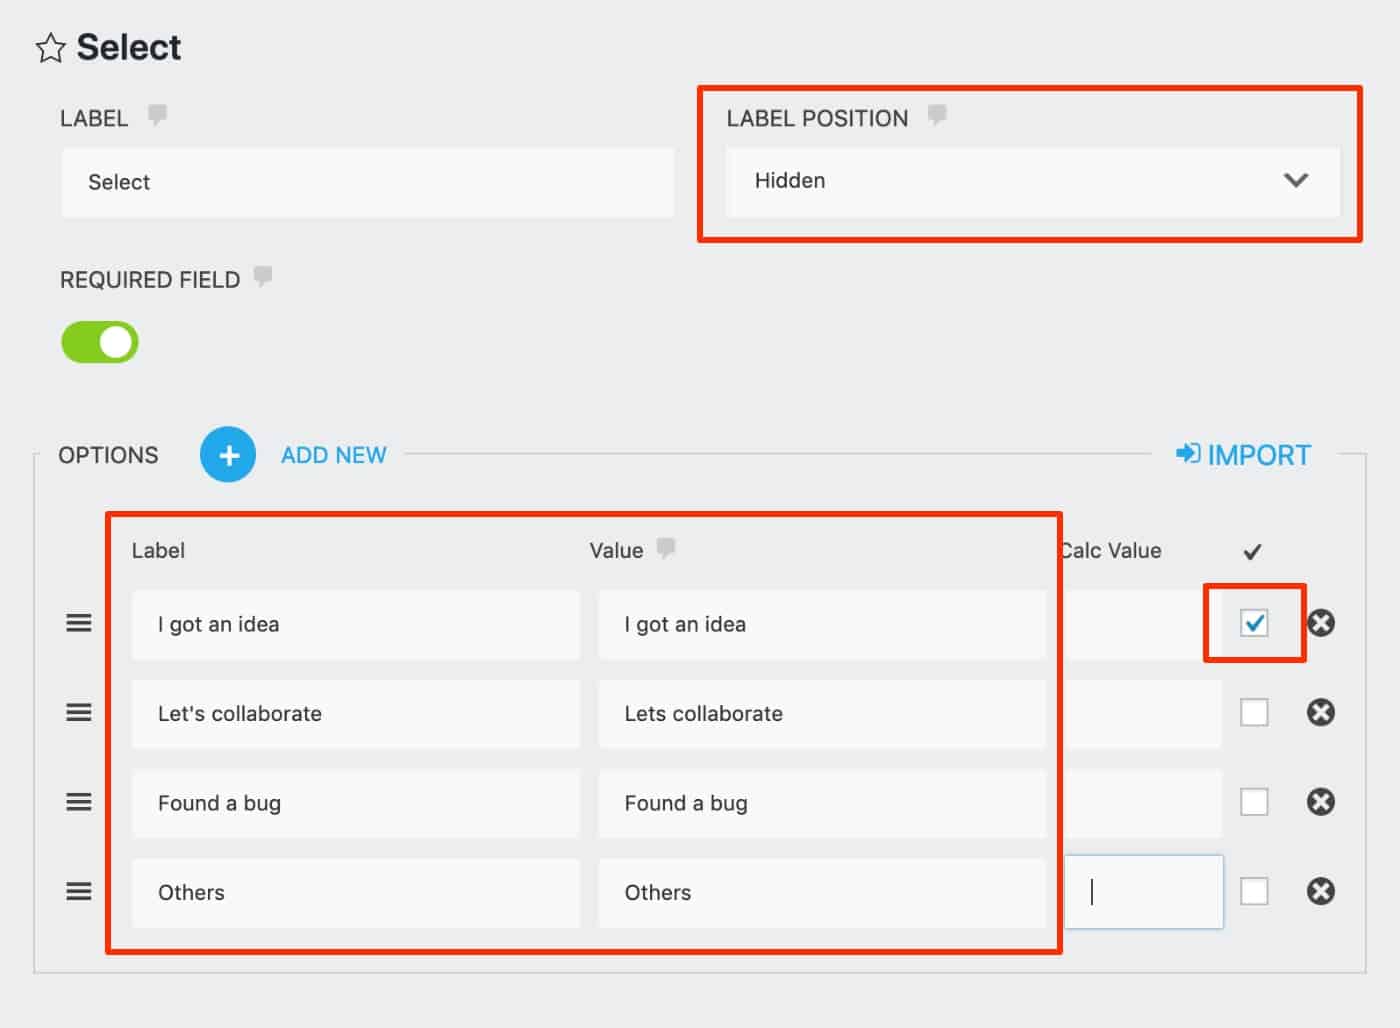
Feel free to change what you want to display on the dropdown. Don’t forget to click on the checkbox to set the default value for the dropdown.
Message Field
For this field, we gonna set the label position to Hidden and add a placeholder for the field.

We’re not touching the container class as this field will be displayed full width.
Click Publish button and we’re done — with the form creation. Now you should see the new form listed on your dashboard.

Notice Ninja Forms provides you with a shortcode you could use to display the form.
Check out the full list of extensions you could use to add more functionality here, e.g file upload, conditional logic, and more.
[click_to_tweet tweet=”Install Ninja Forms’ add-ons to build complex WordPress forms.” quote=”Install Ninja Forms’ add-ons to build complex WordPress forms.”]
Step 4: Add form to a page
Now that we have created the form. Let’s add it to a page. Simply create a new page and insert the form by typing down its shortcode.
In this example, I’m gonna add the shortcode to my page.
You should see the example on the Ninja Forms Demo page I created.
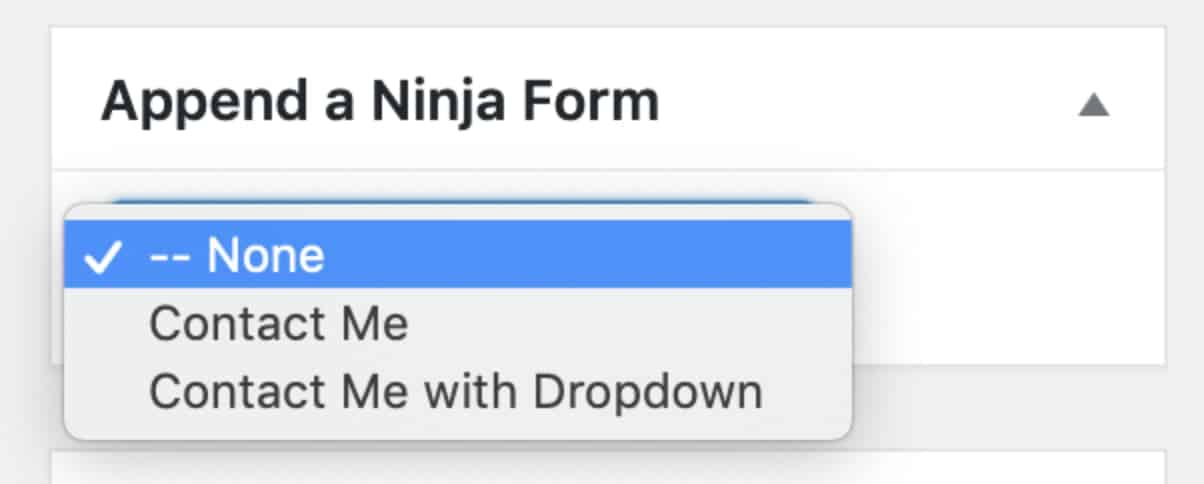
Another way to insert a Ninja Form to a page is via Ninja Forms meta box helper. Any forms you created will be available here. Simple select it and hit Publish. The form will be appended at the bottom of the page.
Personally, I would recommend inserting the form using the shortcode. You’ll have more control over the position of the form on the page.
Final Thoughts
A form is always a nightmare to work with even for a seasoned web developer — let alone bloggers with minimum coding knowledge.
Thanks to drag-and-drop form builder, a complex form can be created in minutes with zero coding knowledge. While there are other similar plugins, Ninja Forms is free — unlike the others. You only need to pay for the add-ons that you want to use.
If you like this tutorial, don’t forget to click on the icons below to share it on social media.
Yuyu
I am a front-end developer and I teaches entrepreneurs who want to grow their audience, start an online business, and pursue their dream life. When I spend time away from the computer, I enjoy reading books and having a cup of green tea.
2 Comments
Add comment Cancel reply
This site uses Akismet to reduce spam. Learn how your comment data is processed.


Hi, I’ve been using the Contact Form 7 plugin but after reading this… I’ll definitely try the Ninja forms.
Thanks for the informative post.
I hadn’t heard of Ninja Forms! Thank you so much for walking us through how to use it 🙂