Do you want to embed videos in WordPress posts?
Embedding video in your post is a great technique to increase user engagement and your average dwell time. It works similarly as bucket brigade — in writing.
According to a statistic by Blue Corona, companies enjoy 27% higher CTR and 34% higher web conversions rate with videos.
Good news is WordPress makes it easy to embed videos from YouTube and other popular video hosting sites.
In this post, I’m going to show you how to embed videos in WordPress posts and pages and what to look after when things aren’t working.
Why You Should Insert Video in WordPress?
YouTube is one of the most powerful social media platforms and it’s the second largest search engine after Google. Vimeo has 170 million monthly viewers. It’s no wonder that internet marketers and bloggers have been turning these videos views into website visits.
Do you know that using the word “video” in an email subject line boosts open rates by 19%, click-through rates by 65% and reduces unsubscribes by 26%?
Look:
Videos make your content more engaging. It adds a breath of new life into a long boring content. Videos are also an effective way to prevent people from skimming your content and leave — reducing the bounce rate.
In addition to that, embedding videos in your blog posts immediately improve the dwell time on your site as users stay longer to watch the video.
Based on this study, the average internet user spends 88% more time on a website with video. In addition to that, embedding video results in 400% higher engagement than static content
Just think about it.
Long dwell times and low bounce rate are two key Google ranking factors. You might also want to check our tips to improve your post readability to increase dwell time.
How to Embed Videos in WordPress Posts and Pages
1. oEmbed
WordPress makes it easy to embed videos, audios, images, and tweets with its oEmbed feature.
You might wonder, what’s oEmbed?
oEmbed is an open format adopted by many websites. It’s designed to allow embedding content from a website into another website simply by posting a URL.
In a nutshell, WordPress will fetch the needed HTML to embed content when you pasted a URL. So you don’t need to copy and paste the HTML from the site you wish to embed.
To embed Youtube or Vimeo video, all you need to do is paste the video URL into WordPress Visual Editor.
As you pasted the video URL, WordPress will fetch the embed code from YouTube (for example) and display the video.
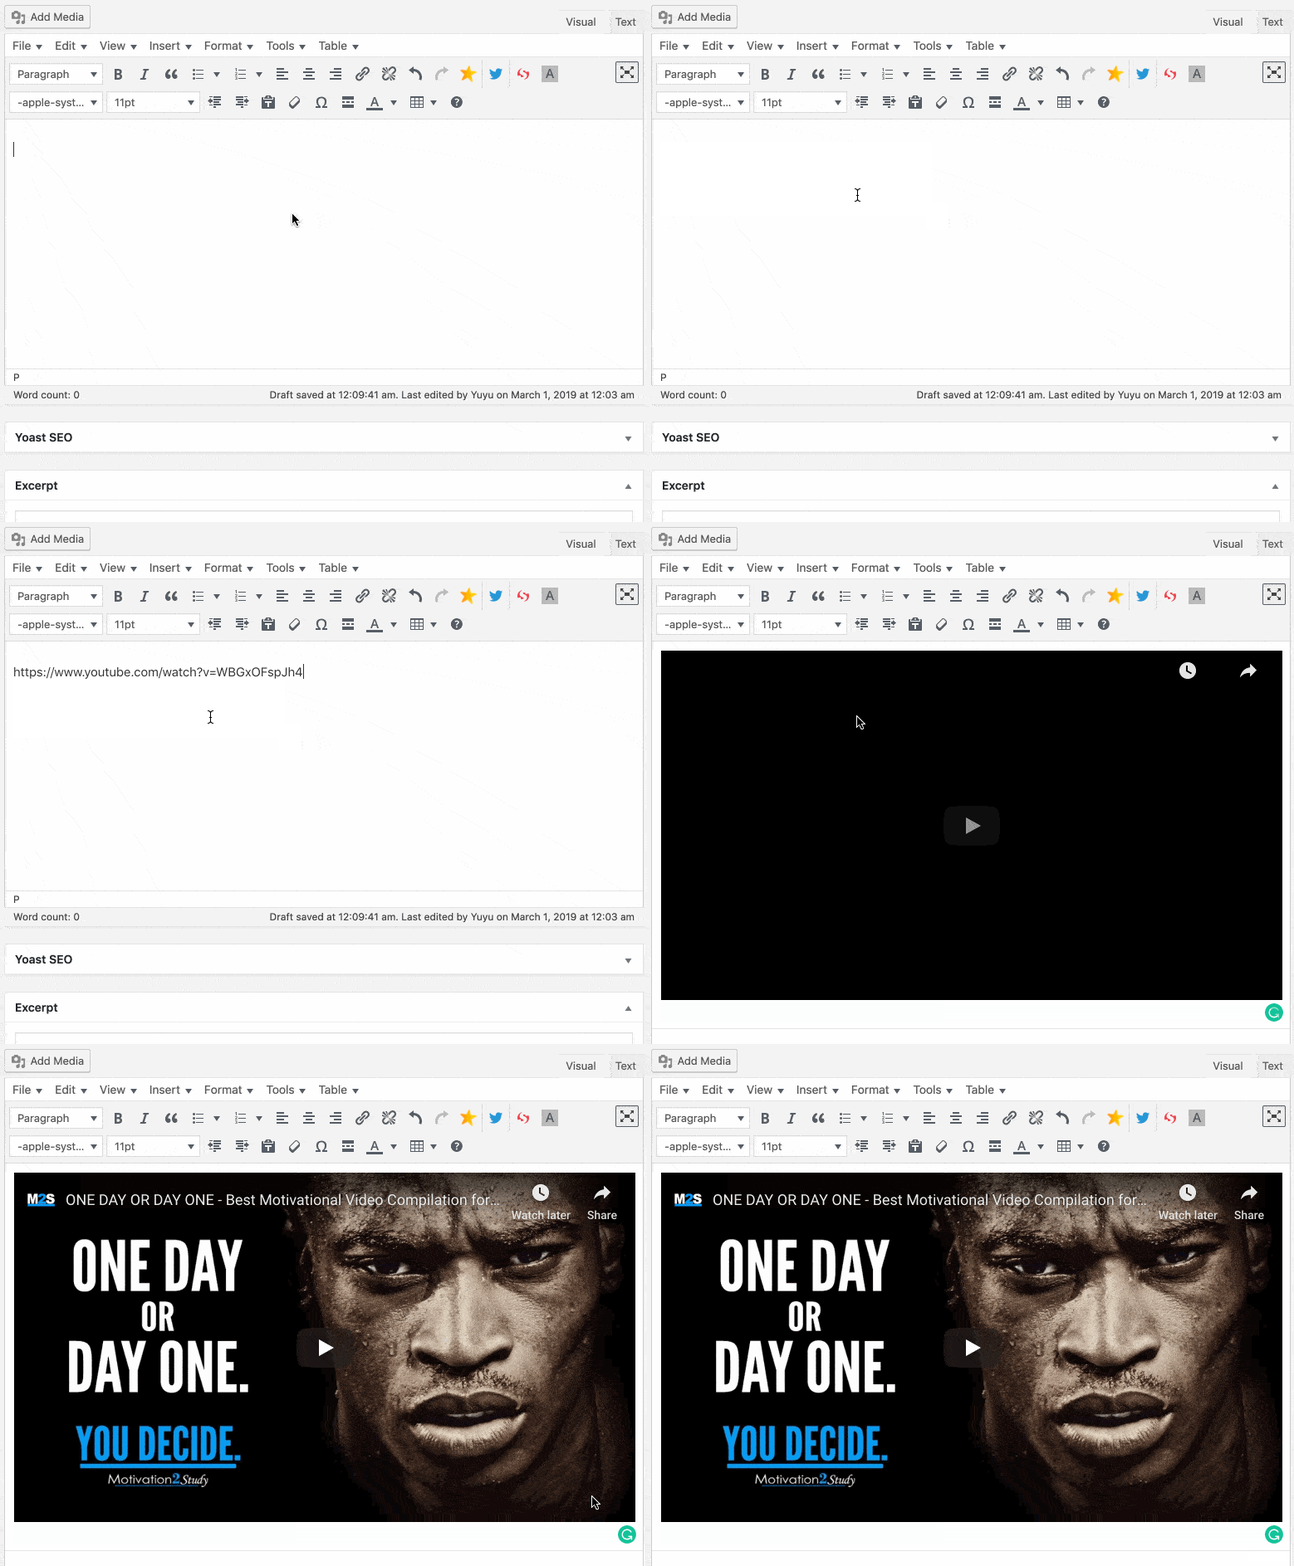
If you’re using the new Block Editor (Gutenberg), you’ll have more control over the embedded video. Adjust width or height. Change video alignment. Add a caption. Or even preserve the aspect ratio on the mobile device. These features aren’t available on the Visual Editor.
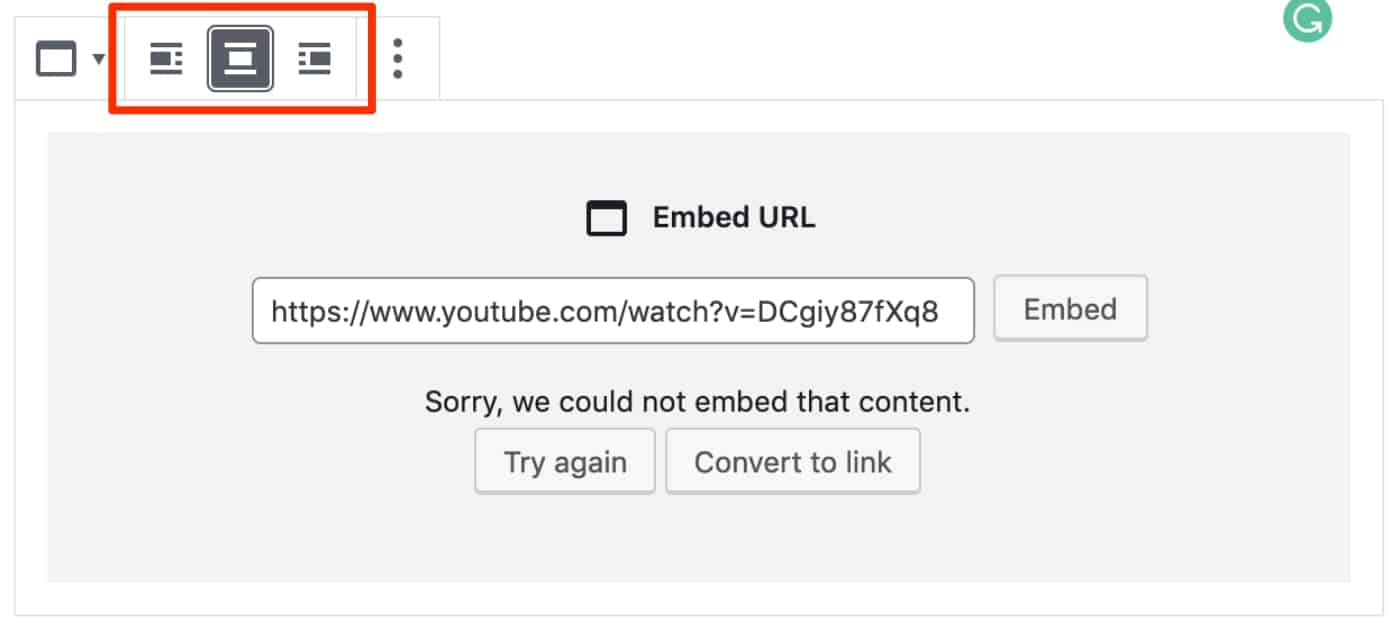
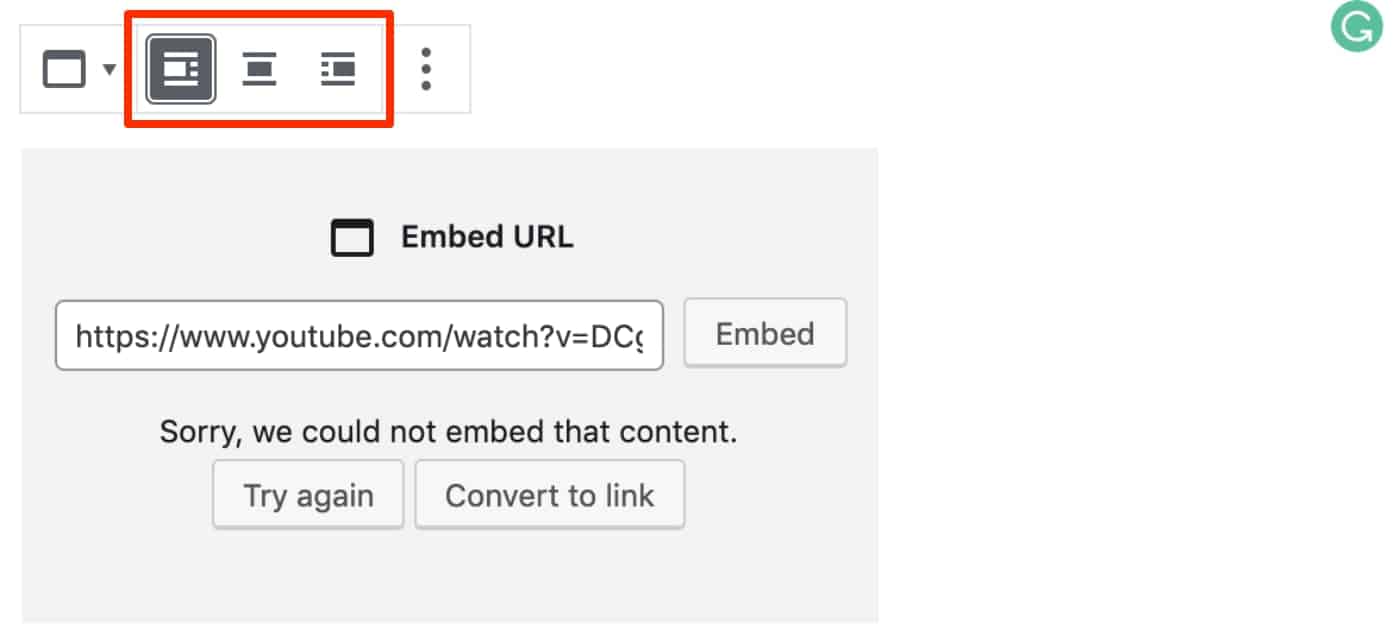
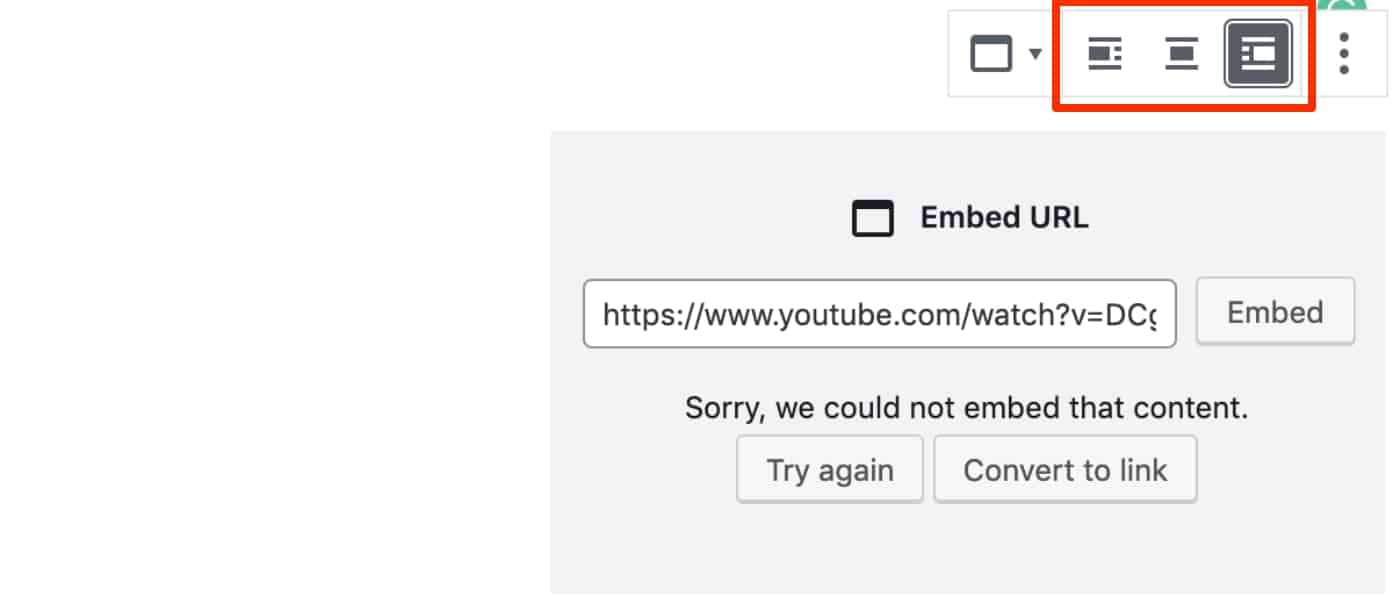
Note: Sometimes you might see the message “Sorry, we could not embed that content.” on Gutenberg. It’s a weird and unexpected behavior but don’t worry. Once you published your post, the video will be embedded in the post. So you could still align your content.

How cool is that?
Unfortunately, oEmbed only works with whitelisted sites. Below is the list of all video, audio, and images services whitelisted by WordPress in 2019.
- Amazon
- Animoto
- Blip
- Cloudup
- CollegeHumor
- DailyMotion
- Flickr
- FunnyOrDie.com
- Hulu
- Imgur
- Mixcloud
- Photobucket
- ReverbNation
- SoundCloud
- Spotify
- TED
- VideoPress
- Vimeo
- Vine
- WordPress.tv
- YouTube
For non-whitelisted sites, you’ll have to copy paste the HTML embed code in the Text Editor or in the “Custom HTML” block in the Block Editor.
2. Embed Shortcode
Another method to embed video in WordPress post or page is to wrap the URL in the Shortcode.
What’s a shortcode?
According to WordPress, a shortcode is a WordPress-specific code that lets you do nifty things with very little effort.
The embed shortcode method is extremely useful if you’re not using the Block Editor just yet.
Why?
When pasting the video URL onto the Visual Editor, you don’t have the ability to set the width and height of the video — which you don’t need to most of the time.
With the embed shortcode, you could specify both the width and height of the video.
To do this, switch over to the Text Editor mode and insert the video URL in the embed shortcode.
Like this:

And get the desired result.

3. iFrame
Okay, oEmbed and the Embed shortcode works great and super easy to use.
So why do we need yet another method? And what’s an iFrame?
iFrame stands for Inline Frame. It’s an HTML embedded inside another HTML on a website. It’s often used to insert content from another source.
Embedding content with iFrame gives you more control over the video. For the YouTube video, you could:
- Make the video autoplay
- Turn on the caption by default
- Hide the video control
- And more…
One feature that I really found it useful is you could set the start and end time of the video.
Imagine this:
You found a video on YouTube for your content. But the video is 1-hour long or even 15-minutes long. Only a few minutes in the video is really what you want to show to your readers. The highly relevant part of the video.
Now:
With iFrame, you could specify the start and end time of the video content you embedded. So you could lead your readers straight to the point. No fluff, just stuff.
In this example, we’re gonna use YouTube. First off, open a YouTube video on your browser. Click on the “Share” link button and click on the “Embed” button.
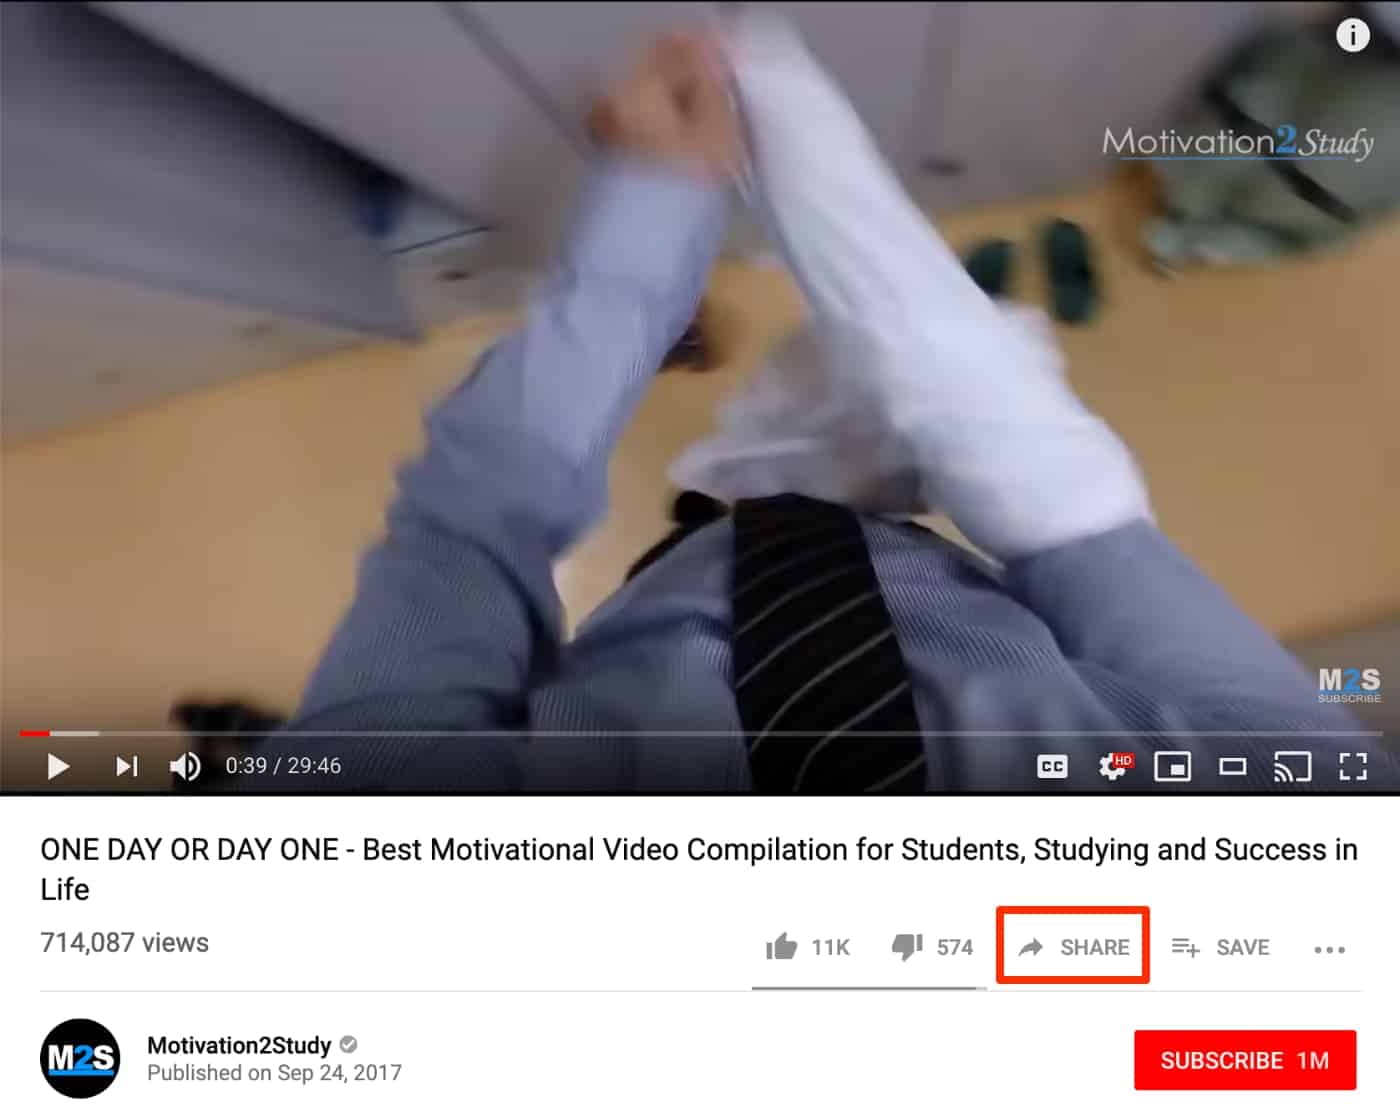
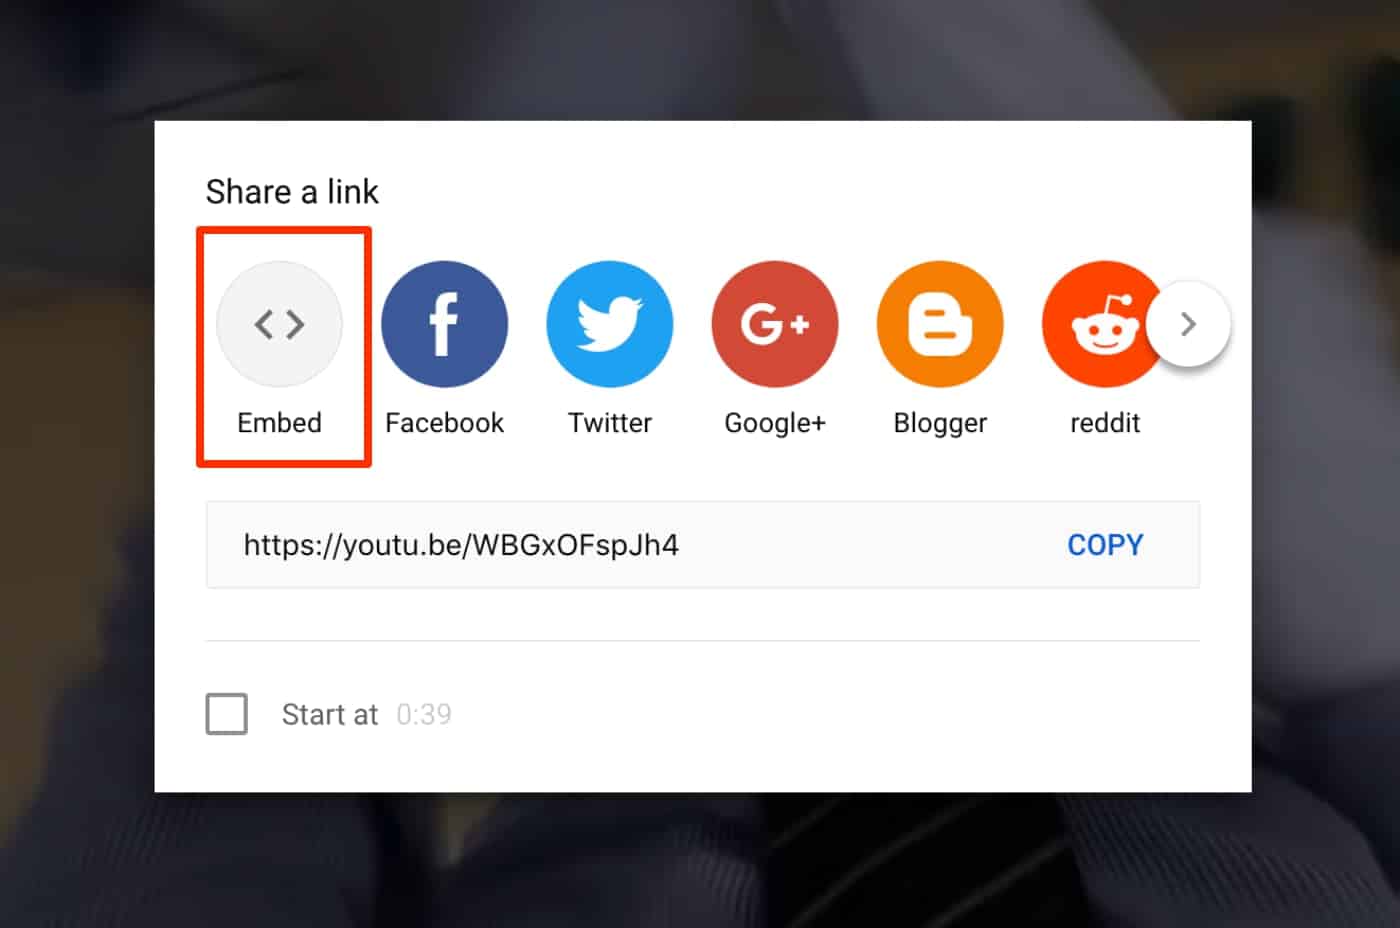
You should see something like this:
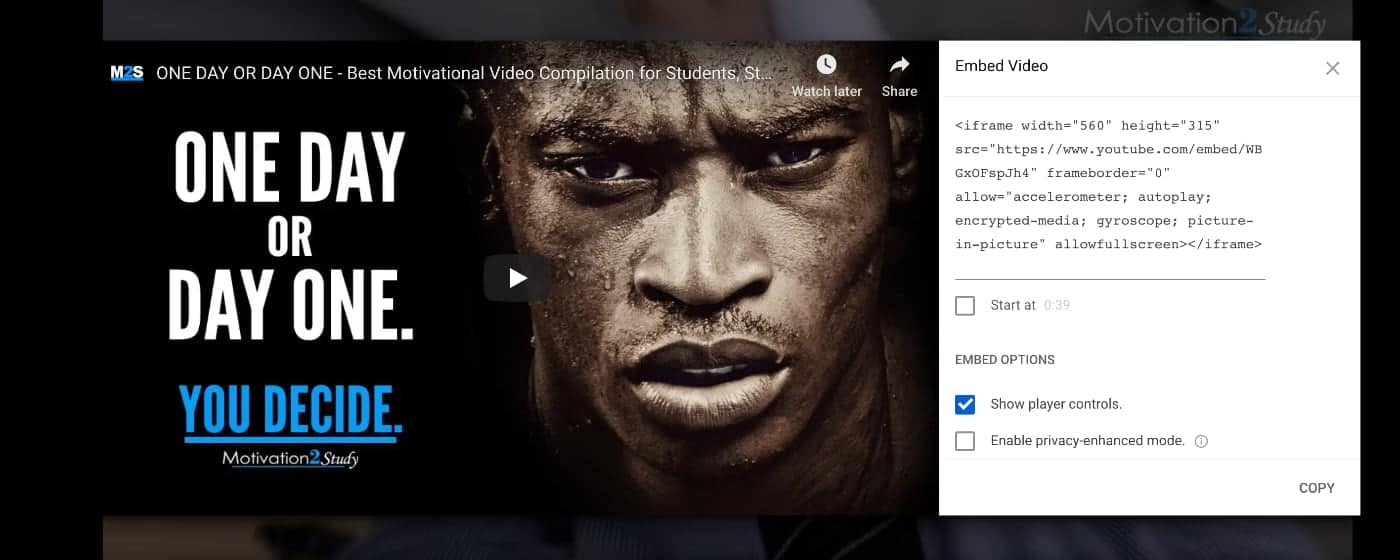
By default, YouTube will provide you with:
- iFrame embed code
- Option to set the start time of the video. If you don’t set this, the video will play from the beginning.
- Show/hide the player control
- Enable/disable the privacy-enhanced mode
Click on the “Copy” button to copy the embed code. And you’ll get the code as seen below:
<iframe width="560" height="315" src="https://www.youtube.com/embed/TgKaCY5iS_s" frameborder="0" allow="accelerometer; autoplay; encrypted-media; gyroscope; picture-in-picture" allowfullscreen></iframe>
I want you to pay attention to the src attribute in the embed code. As I mentioned earlier, iFrame gives you more control over the video. You could turn on/off the autoplay, hide/show control, specify start/end time of the video and more. To do this you need to inject the right parameters to the src attribute.
By default, autoplay is disabled by YouTube. To enable it, add autoplay=1 parameter to the src.
The URL will become: https://www.youtube.com/embed/TgKaCY5iS_s?autoplay=1
To specify start time of the video, add `start=xxx` parameter to the src. It takes in the time in seconds. E.g to start at the 2 minute mark, you’ll add start=120. 120 seconds = 2 minutes.
To specify end time of the video, add end=xxx parameter to the src.
To hide the video controls, add controls=0 parameter to the src.
Your src attribute will be something like this:
https://www.youtube.com/embed/TgKaCY5iS_s?autoplay=1&start=120&end=240&controls=0
These parameters tell YouTube to auto play the video on the browser, hide the video player control and play the video from minute 2 to minute 4.
Notice that, before adding the first parameter, always prefix it with ? symbol and prefix subsequent parameters with the & symbol.
The new embed code would look something like this:
<iframe width="560" height="315" src="https://www.youtube.com/embed/TgKaCY5iS_s?autoplay=1&start=120&end=240&controls=0" frameborder="0" allow="accelerometer; autoplay; encrypted-media; gyroscope; picture-in-picture" allowfullscreen></iframe>
Video Troubleshooting
Q: Can’t watch embedded video in my post?
A: This is the most common issues with embedding video. The video uploaders are able to enable/disable the embed function of the video. Do make sure the video embed feature is enabled.
Q: Is the iFrame method responsive?
A: No, by default the iframe method is not responsive. You need to wrap the iframe code in a div tag and apply additional CSS to make it responsive.
Final Thoughts
It comes as no surprise video is the future of content marketing. Videos are great to keep your readers engaged and get your message across. And it works best to increase the dwell time on your site.
I hope this article helped you learn how easy it is to embed video in WordPress blog posts and pages. You might want to see our list of must-have resources and tools for WordPress.
Yuyu
I am a front-end developer and I teaches entrepreneurs who want to grow their audience, start an online business, and pursue their dream life. When I spend time away from the computer, I enjoy reading books and having a cup of green tea.
8 Comments
Add comment Cancel reply
This site uses Akismet to reduce spam. Learn how your comment data is processed.
Very helpful information. I’ve been adding videos to my content for every post and it does increase time spent on my site and page views are increasing.
My videos are not great, but they’re not horrible. I wish I had a kitchen that had an island and better lighting for my recipe videos, so I use still photos, text, and music for a lot of my recipe videos.
It’s a good start definitely. Saw your blog, I like the way you mix different type of content to make your post more enjoyable.
Your posts are always so informative and helpful Yuyu! Thanks for sharing. I’m hoping to do more video content this year and I am so glad for your advice 🙂
I have embedded some video, but I need to do more. I know the basics, but there are many other things a blogger can do, as this fine post points out!
Glad it helps
Thank you for the great information. I think I can figure it out with this help.
You’re welcome, Mylinda
Yuyu, very useful post! So, how did you do that neat Table of Contents thing up front? Also, That trick for embedding a video AND allowing it to show only the part you want is awesome. I know that YouTube allows you to click the option to set a “start at” time, but then the video plays forever. Nice work.